
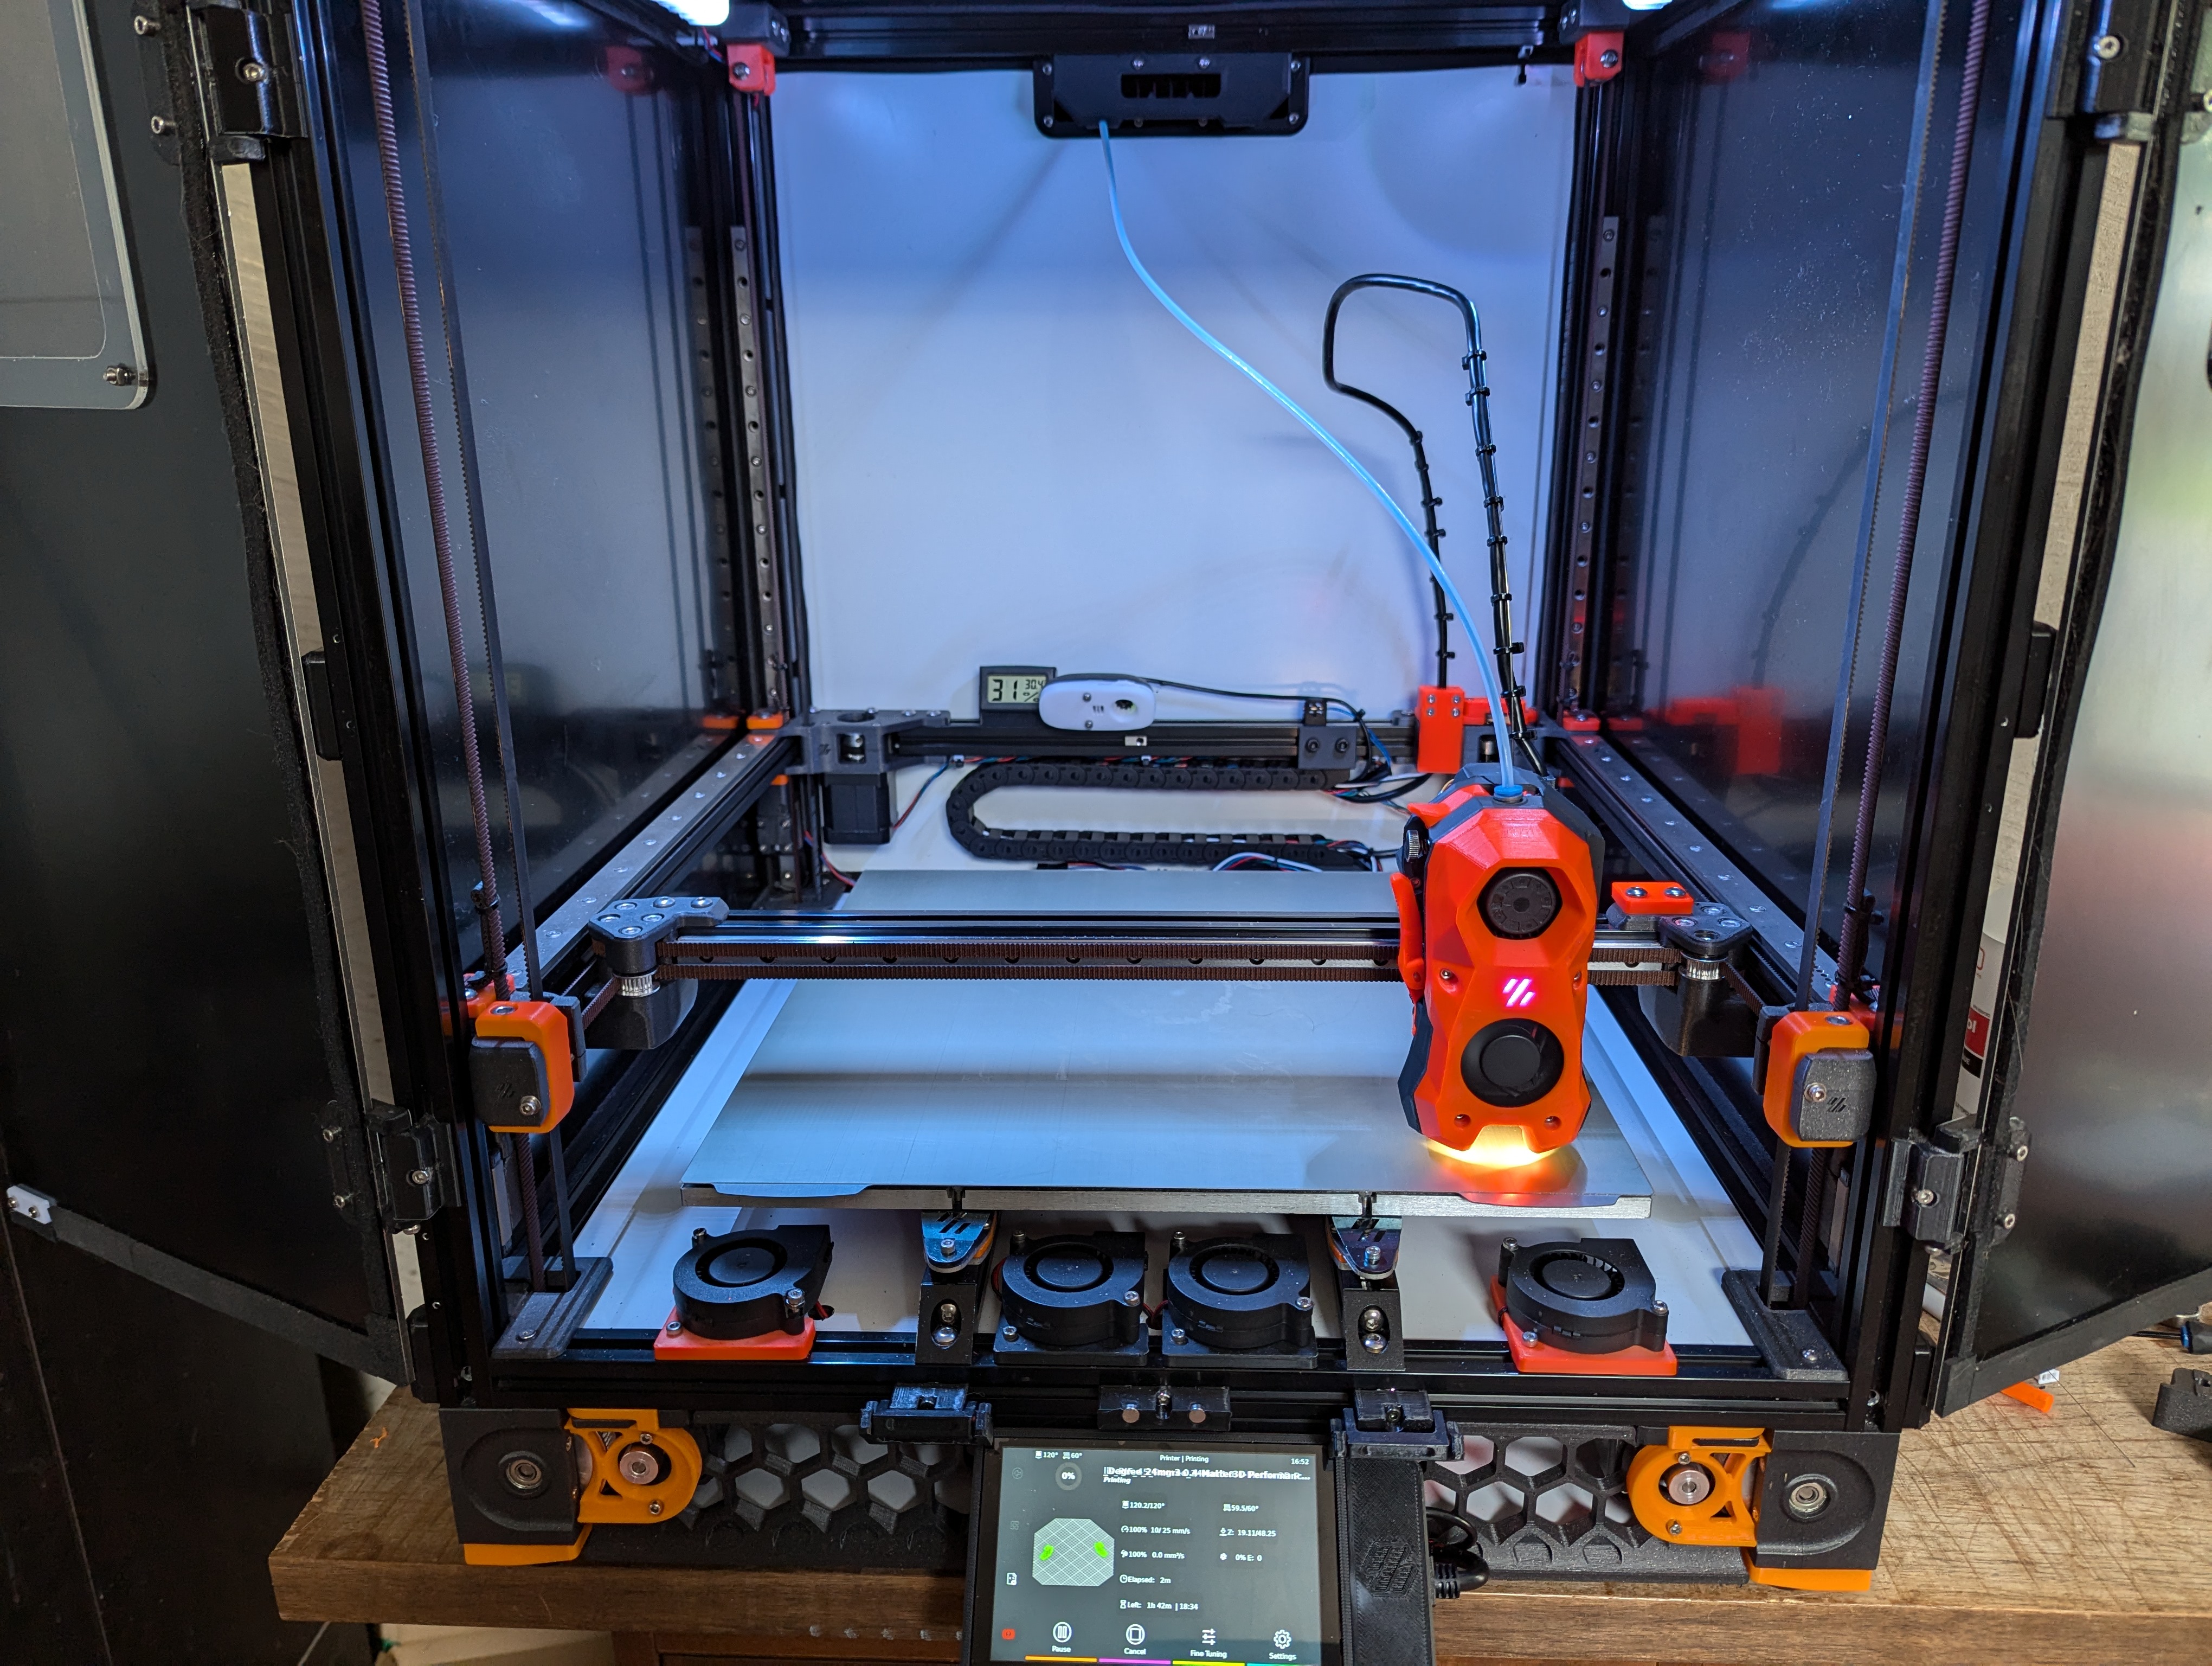
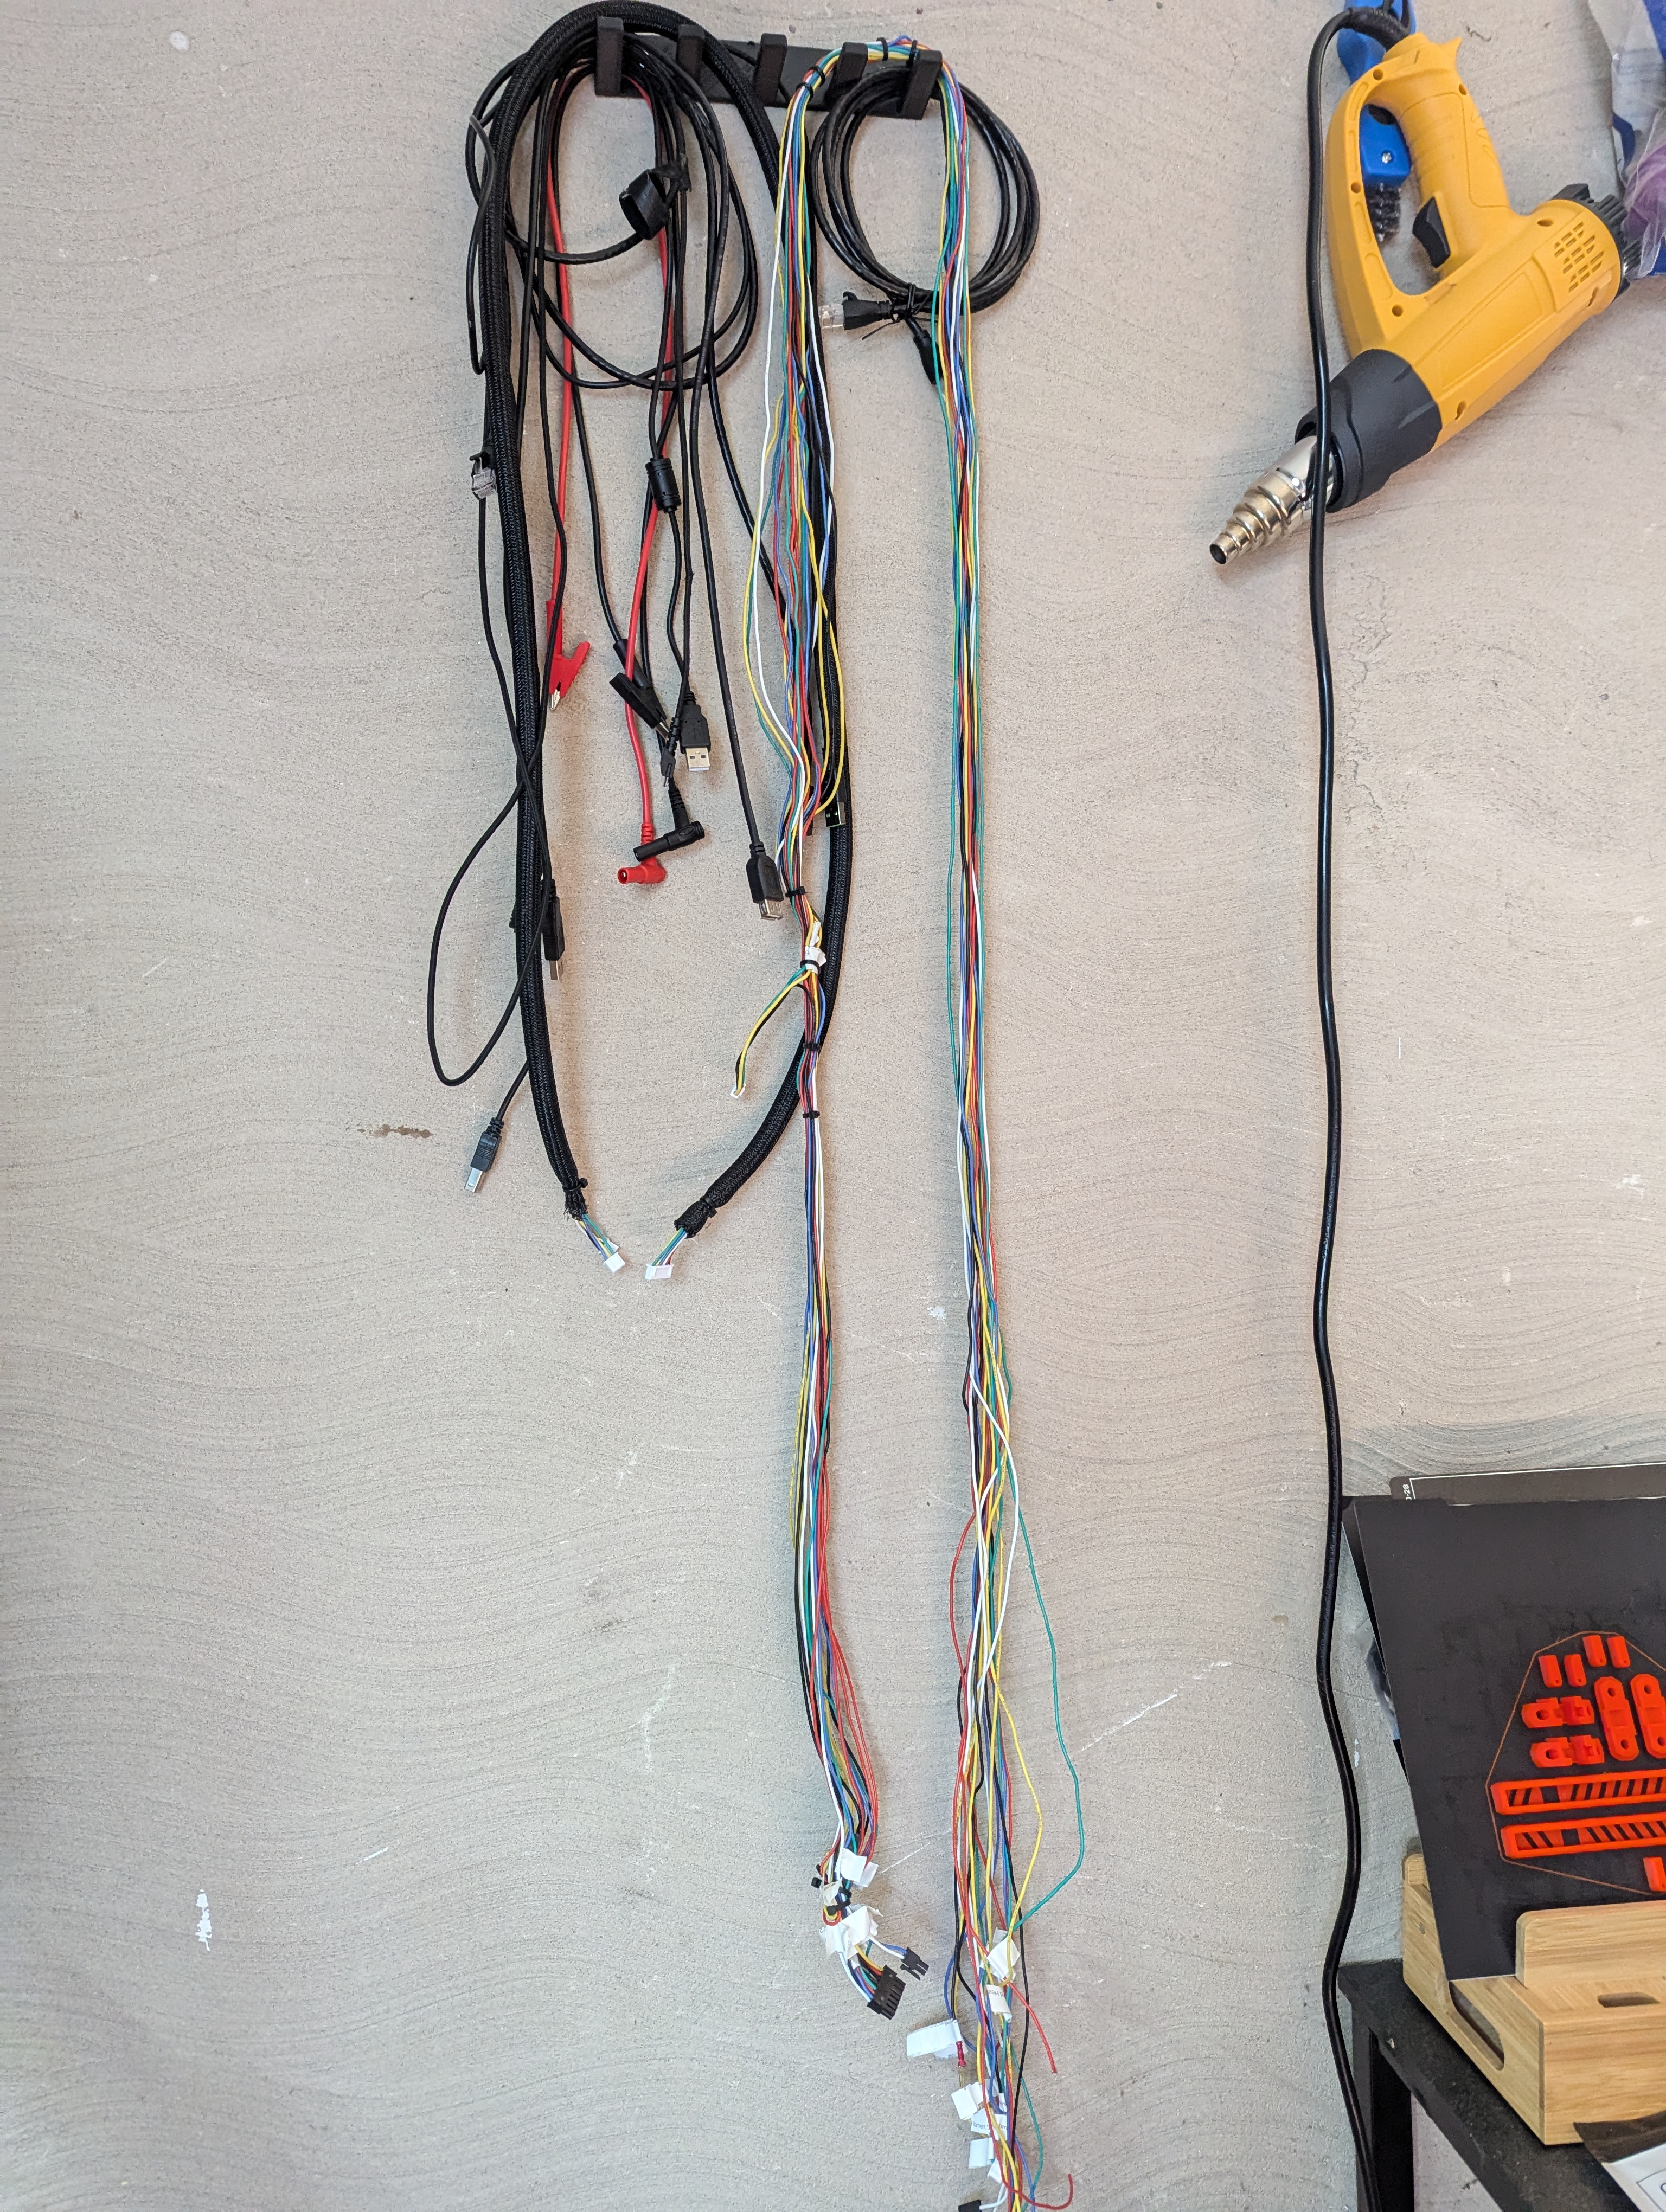
Planning on finishing an ercf this year and going can for that so figured good opportunity to swap the hotend over, saved a substantial amount of wiring even compared to the hotend PCB I had, saved the wiring harness just to compare
 went for a usb can device over running can from the octopus pro, did want to swap the pro over to can as well but ended up keeping it the same instead of messing with reflashing firmware. Hotend has a little 3015 fan and a heatsink on the arm chip so cooling should be fine, looked up the datasheet and it’s got a tjmax of like 120c and rated for ambient -40-80c so don’t think I need to worry about it, if it’s an issue I’ll run a fresh air feed to it, will see how it likes abs in the summer shortly.
All in all, super easy swap over, definitely cleaned up my rats nest (though I still should cut the stepper wires to length, they hide in the imitation panduit I printed, it’s neat enough to be serviceable and not be a hazard), used katapult (formerly canboot) and then flashed klipper onto the board, only minor issue is it uses these tiny jst connectors, like really small, btt ebb sb2209 and btt u2c usb can device, was a good resource to follow for any of the network interface configs that I needed to do and gave some good details on diagnostics.
Nice build! It’s also nice to see 4x bedfans (2 are in a filter, but still). I wish more people talked about bedfans, especially with larger printers and ASA/ABS. The other unspoken secret is chamber insulation if you want to do big ASA/ABS prints.
Thanks! I did a nevermore max (what you can see at the top) so they’re all exposed, they do make a huge difference to chamber temps. I used buildtak surfaces and seriously they’re unbelievable, I have their pei surface on now which doesn’t grip as hard but wow if it doesn’t work for brimless warp prone material, surfaces being damaged isn’t a huge issues as I can just replace the decal. I finished the original build about a year ago and had some cludged together mods to get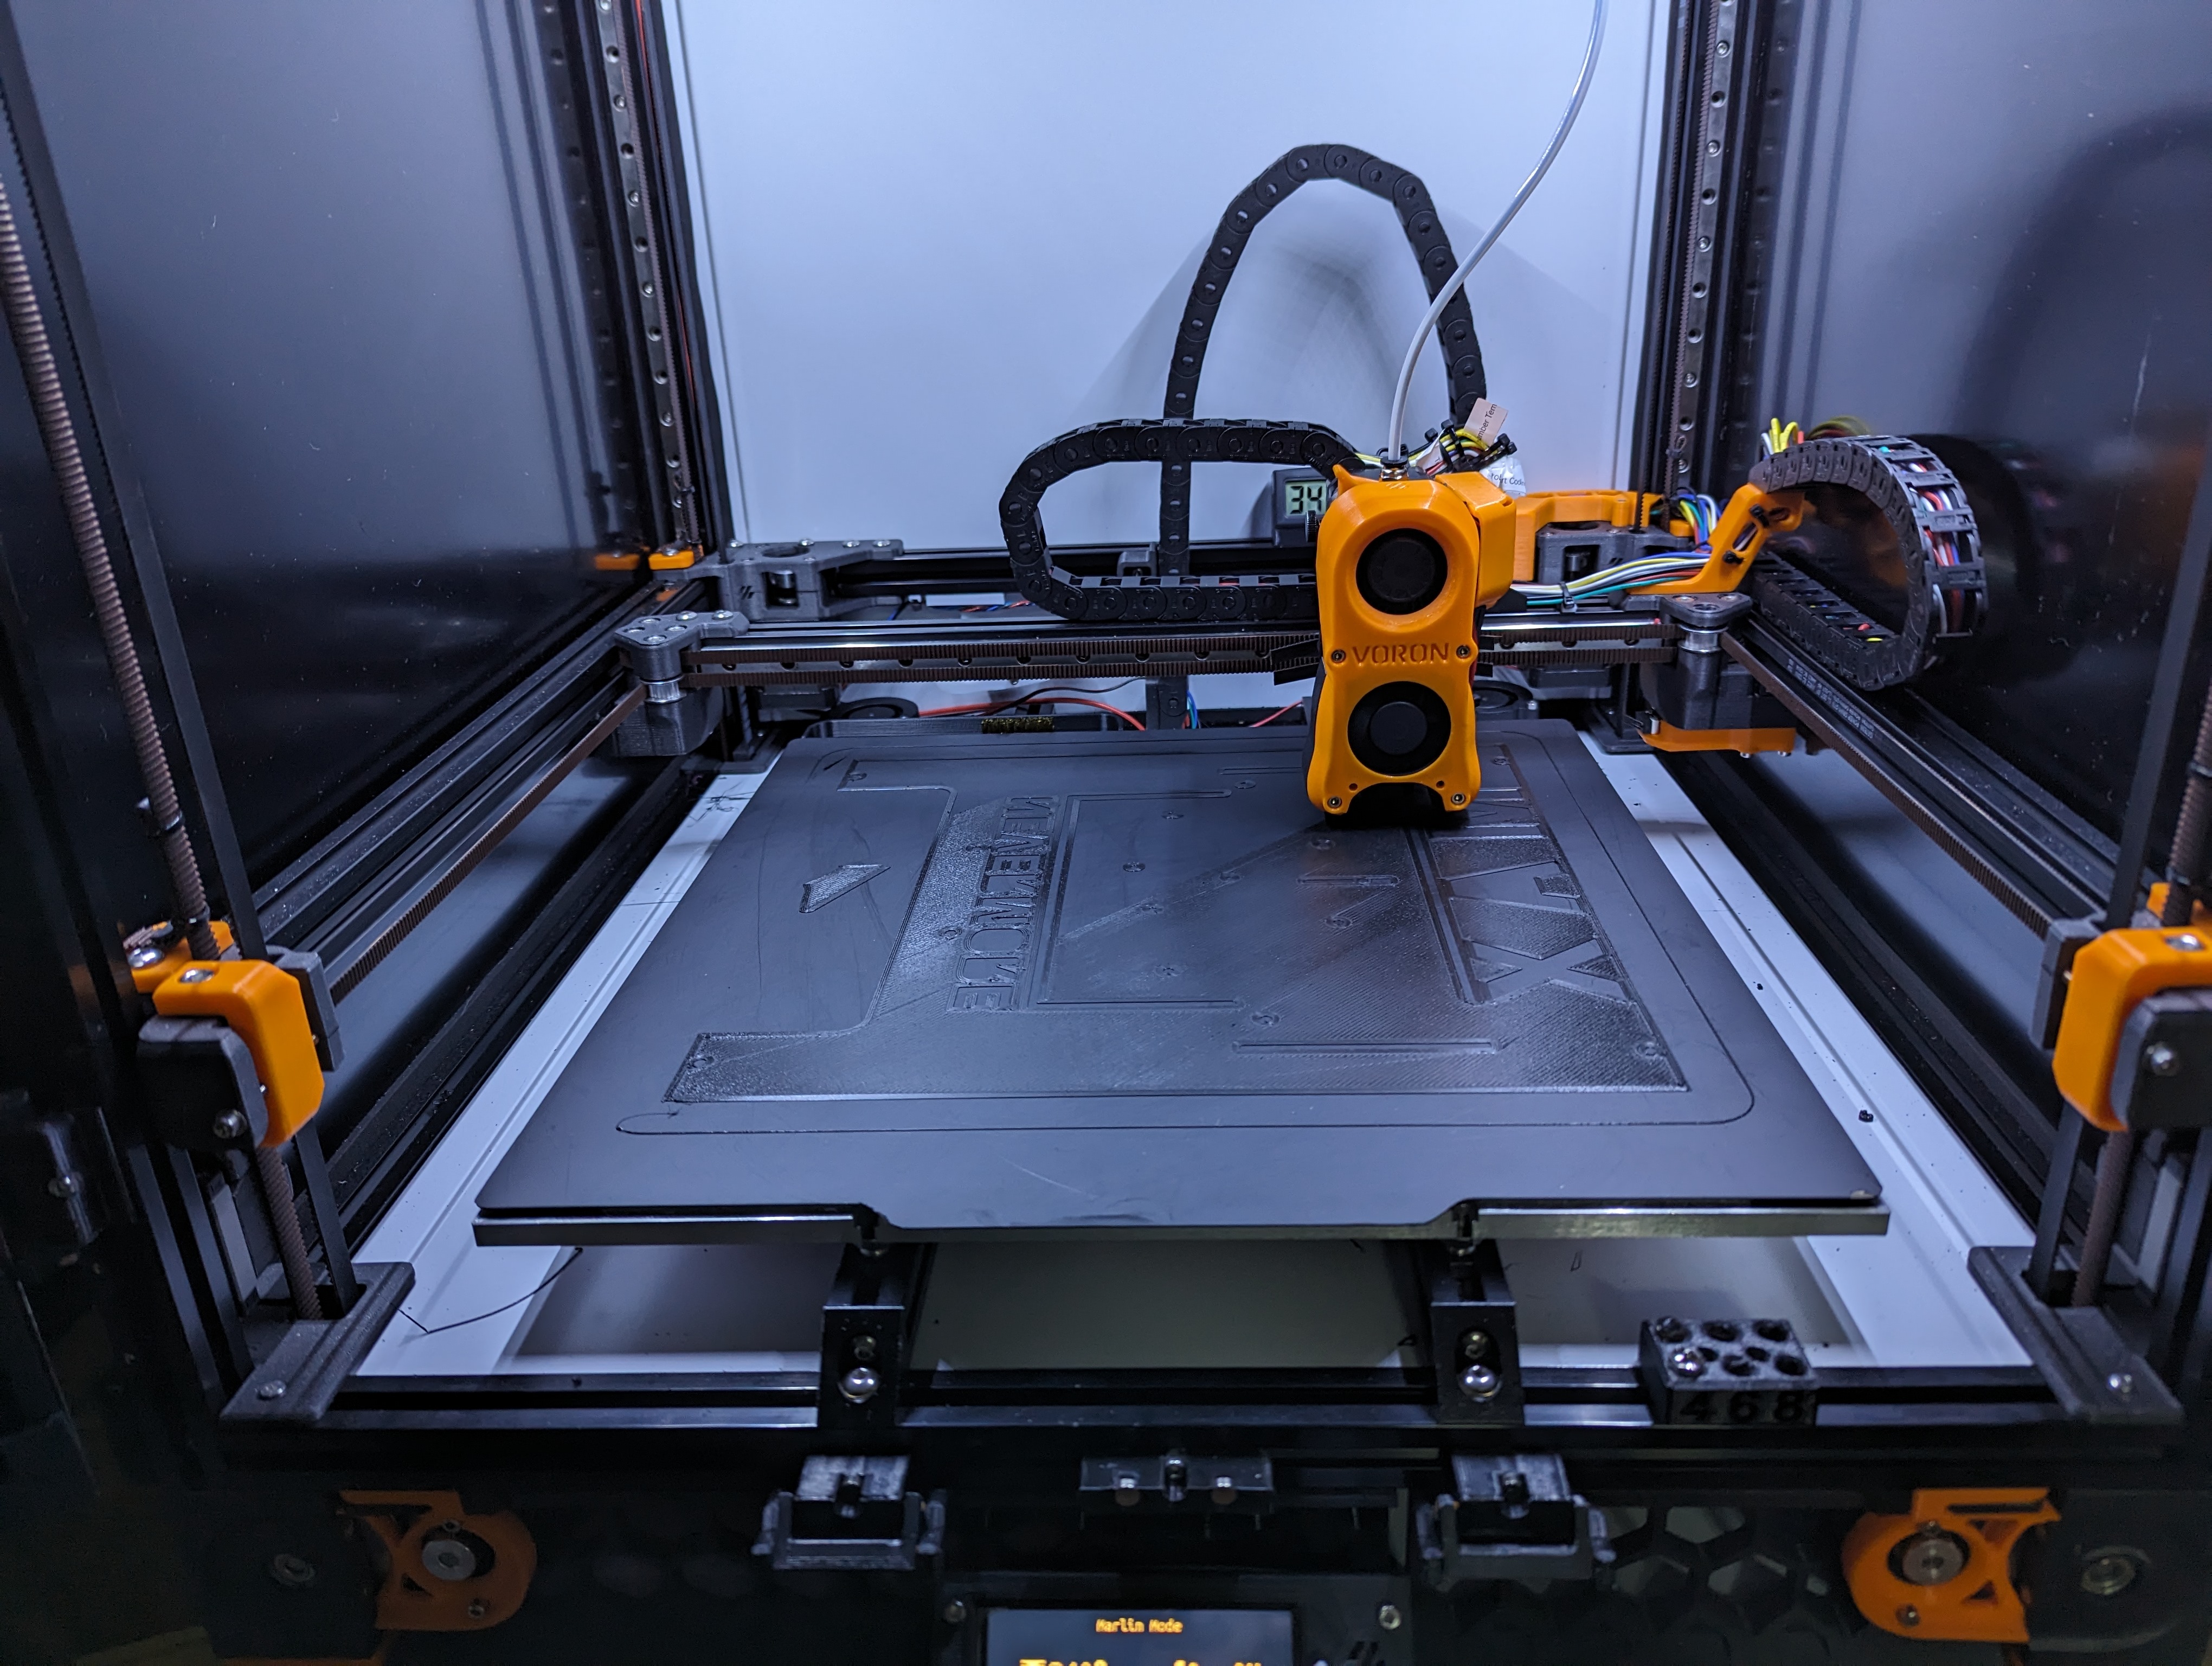 stuff like the tap probe going with cw1 (it was super jank, SB+cw2 is so much better for maintenance, also did one to mount a dragon UHF)
I have aluminium composite panels and they’re ok insulation wise, did you end up going for full insulation on your panels? I think I recall you looking into that reflective insulation material at one point. One more edit, my only concern is ambient temps, it was mid - high 30s last week, I do want to climate control my garage eventually, just don’t have a great way of doing that right now.
These printers are totally like hobby cars, swear I do more mods than anything else.
I’m currently rocking the stock acrylic panels. I do have ACM panels, that I plan to insulate with that radiant bubble insulation stuff, but haven’t gotten around to printing new (deeper) magnetic panel mounts.
I’m running a PEI bed and recently had a part pull the spring steel up with it, so adhesion isn’t my issue. Tossing some blankets and sweaters over the printer cured my warping with a (just barely) 60° C chamber.
I’ve been trying to keep printer fiddling down, but it’s easy to get caught up in tune this, macro that with the goal of reducing fiddling in the long term. Speaking of which, I really need to do input shaping…
I had issues getting spi going with my lepotato for whatever reason, at least getting the sensor to work with klipper, so I ran it directly from an spi header on the mainboard, found that super easy to get going. Was going to run a port to the skirt so I could connect when I need but the new toolhead has it built in. Can’t really say if it’s made a massive difference, maybe less vibration when printing? Macros are probably up there as one of my favourite klipper features that I don’t take enough advantage of, just done some loading and unloading assist ones and some basic preheat ones. What I really need to do is get around to doing filament profile tuning and putting them somewhere to share between machines (slice on my laptop, desktop and lab machine, it’s a mess), really should keep a list of things I plan to do so I don’t forget.
The nevermore max warped like that on me, the one I printed is 300x300 square with thin ish walls so prone to warping, I ended up doing the warp prone stuff in petg.